The original Nissan 300zx specialist


 ........"TECH HELP"........

 .
.
Hints, Tips & help on fixing and servicing your Zed click on any of the symbols below to find out more about each subject
....
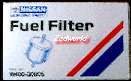
Fuel filters are a less frequent service item but should be not forgotten as a blocked or contaminated filter can upset fuel flow and pressure resulting in poor running and performance.
As with all injection cars a degree of care must be observed around fuel and high pressure lines.As a high pressure can still be present in the fuel lines even some hours after the car has been running the following precautions MUST be observed.Before removal of any fuel lines the pressure must be releases by removal of the petrol pump relay (and run the car until it cuts out) behind the drivers side kick plate (yellow relay) or an alternative is to leave the car overnight sufficient pressure will have disapated by then.Place a generous amount of paper towel around the filter area (top of near side wing under bonnet) and release the two hoses with a phillips screw driver.Also the bracket over the filter is undone with the screwdriver.Remove the two rubber hoses by pulling and turning the filter together, a bit of patiece can help here as they are quite tight.Once removed ther e is a plastic insert (3" long) down the outlet pipe of the filter.Insert a wood screw slightly and pull out, re-insert in new filter.Fit into braket refit hoses and tighten points. When starting the engine look out for fuel leaks and only put the bonnet down after you are certain no leaks exist.
Fuel Filter Nissan part No.16400 - Q0800
Zedworld replacement price Ł32:00 *
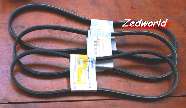
The ancillary belts : 1) Fan / alternator belt 2) Power steering belt 3) Air conditioning belt
As a rule the best time to change these is when doing the timing belt as they have to be removed anyhow. But if you need to do them at another time he is how. Firstly if one needs changing do yourself a favour and do them all because its not a pleasant job to do and the last thing you need is to have to go back in again.
The belts fit in the following order alternator belt closest to the engine then the air con belt thgen the power steering belt. Access to below the car is required using a jack and firm axle stands, also the removal of the main under tray, this is held in place by 6 10mm self tapers. fom below the adjustments to the alternator and the power steering are viewable. On both a captive slide is used,( also a jocky wheel on the air con) and again on both release the slide block 14mm socket or spanner for the air con and a 12mm socket for the alternator.Then it is a case of backing off the adjustment to release the tension on the belts sufficiently for the belts to come off.
Having returned to the top now turn the engine ( using 27 mm socket on the crank bolt.) whilst viewing the power steering pulley, this has hole`s in the front face when a hole lines up with a 14 mm bolt at about the 1 :O0 clock position STOP! this 14mm bolt needs to be undone a little but not removed, this is the pivet point bolt for the pump and if this is not undone no amount of pushing and tugging will move that pump, Same again applies to the pump it has a sliding block adjuster secured with a 12mm nut, release this and back of the adjuster to release the belt.
When all off, replace the belts in the above order and reverse the operation, when tensioning make sure to turn the engine over ( using 27mm socket on the crank bolt.) between final adjustments to ensure the belts are sitting correctly.Ensure all sliding blocks are retightened and the bolt vieable through the steering pump pulley tight.
Note: The steering pump belt is the toughest one and will need forcing off and forcing on a bit, best way is to get new belt in position and turn engine ( using 27mm socket on crank bolt ) to pull belt on over pulley.
As a way of speeding up the proccess you can cut off the old belts with a Stanley knife.
Zedworld replacement price Ł70:00 *( all three belts )
Due to the high temperature that even the non turbo engine runs at and the complex breather system oil regular changes area just as important as turbo zed`s.
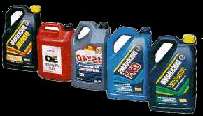
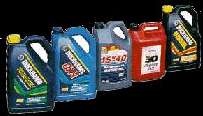
Improvements in oil technology over the past 10 years or so has left a wealth of choice in makes type and of course price added to this most all all is now good quality and meet recomended manufactures rating.
Looking at the different specifications can be often baffling as although there is a set criteria of quality and garde references like ???????? the way manufactures label their product and market iot can some times make a side by side comparisson difficult and for that reason below are three reccomended brands and their benefits and prices.
Regular oil and filter changed on the 300zx are essential to maintain a healthy engine and it really is "money in the bank"as far as reliability and resale are concerned.
A typical change should be around 4500 miles or every 6 months for a non turbo & evry 3000 miles or 4 months for a twin turbo months whatever comes first, just because you may not use you car very often does not mean oil changes can be ignored.
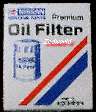
Oil types and grade are important and Castrol Magnetec (for modern engines) is a first class choice, together with a Nissan filter
( part NoA5208 H8904 ) and sump plug washer.
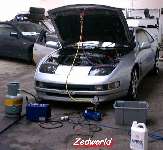
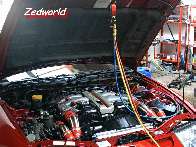
After warming the engine and raising the car safely ands supported on axle stands you need to release the oil from the sump using a 14mm socket and a catch tray that can hold at least 5 litres and preferably 6+ litres (easier to move with out spilling)
One tip, remove the oil filler cap and dipstick before releasing the old oil that allows air in at the top of the engine and assists the speed of flow when draining.
Allow the old oil to drain for as long as possible and no less than 15 mins, now release the oil filter which is located adjacent to the drain plug, one word of warning the filter will be full and you will need a drip tray for this also to empty into.
After draining clean up the sump and oil filter area and tighten in the sump plug fitted with a new copper washer (essential) Half fill the new filter, smear the sealing gasket with a little oil and tighten in to place by a firm hand only.
Now return to the top of the engine and initially fill with 3.5 litres of oil, replace the dip stick and the oil filler cap and start the engine, take a moment to check for leaks and watch the oil pressure. After 2 or 3 mins switch off the engine and wait for a further 2 or 3 mins for the oil to drain to the sump,Now take a level reading at the dip stick and fill as necessary, on average a 4.5 litre can of oil will not quite go in so transfer what is left in to a suitable container and keep for topping up at a later time.
Responsible disposal of the old oil is paramount as it has carcinogenic properties so use the now empty oil can and transfer from your drip tray. clean all areas and dispose of at any local rubbish tip that has on old oil facility.
Remove axle stands and jack using normal safety procedures. keep a check on the level and top as required.
Zedworld replacement price Ł 48:00 * ( inc oil )
No amount of care or maintenance is more important to a turbo zed than regular oil changes ( every 3000 miles) the dvtt although a powerful unstressed engine is complex in it`s actual power management and this is it`s week point. .
Where a lesser car would fail or refuse to run the TT engine soldier`s on often given no warning signs to the driver, if when a problem occurs the lubrication system is compromised as well by poor quality, wrong grade or simply dirty oil then disaster can strike.
Improvements in oil technology over the past 10 years or so has left a wealth of choice in makes type and of course price added to this most all all is now good quality and meet recomended manufactures rating.
Looking at the different specifications can be often baffling as although there is a set criteria of quality and garde references like ???????? the way manufactures label their product and market iot can some times make a side by side comparisson difficult and for that reason below are three reccomended brands and their benefits and prices.


What price do you put on the oil in your car's sump? After all, it is the lifeblood of your car's engine. In the past decade there has been a revolution in car engine oil. All oils are no longer the same. Thanks to the advent of GTi's, 16 valve engines, turbos and the black death, the days of one oil catering for everyone are over.
Take Castrol for example. They led the field for years with GTX. This was surpassed a few years back by semi-synthetic and fully synthetic oils, including GTX2 and GTX3 Lightec. Now, that's been surpassed by Formula SLX which will cost upwards of Ł50 for 5 litres. And most recently, Castrol GTX Magnatec which is muscling in on the hitherto separate world of friction reducers.
Regular oil and filter changed on the 300zx are essential to maintain a healthy engine and it really is "money in the bank"as far as reliability and resale are concerned.
A typical change should be around 4500 miles or every 6 months for a non turbo and every 3000 or 4 months for a twin turbo months whatever comes first, just because you may not use you car very often does not mean oil changes can be ignored.
Oil types and grade are important and Castrol Magnetec (for modern engines) is a first class choice, together with a Nissan filter
( part NoA5208 H8904 ) and sump plug washer.
After warming the engine and raising the car safely ands supported on axle stands you need to release the oil from the sump using a 12mm socket and a catch tray that can hold at least 5 litres and preferably 6+ litres (easier to move with out spilling)
One tip, remove the oil filler cap and dipstick before releasing the old oil that allows air in at the top of the engine and assists the speed of flow when draining.
Allow the old oil to drain for as long as possible and no less than 15 mins, now release the oil filter which is located adjacent to the drain plug, one word of warning the filter will be full and you will need a drip tray for this also to empty into.
After draining clean up the sump and oil filter area and tighten in the sump plug fitted with a new copper washer (essential) Half fill the new filter, smear the sealing gasket with a little oil and tighten in to place by a firm hand only.
Now return to the top of the engine and initially fill with 3.5 litres of oil, replace the dip stick and the oil filler cap and start the engine, take a moment to check for leaks and watch the oil pressure. After 2 or 3 mins switch off the engine and wait for a further 2 or 3 mins for the oil to drain to the sump,Now take a level reading at the dip stick and fill as necessary, on average a 4.5 litre can of oil will not quite go in so transfer what is left in to a suitable container and keep for topping up at a later time.
Responsible disposal of the old oil is paramount as it has carcinogenic properties so use the now empty oil can and transfer from your drip tray. clean all areas and dispose of at any local rubbish tip that has on old oil facility.
Remove axle stands and jack using normal safety procedures. keep a check on the level and top as required.
Zedworld replacement price Ł48:00 * ( inc. oil )
Air control filters..
Standard air filters are relatively easy to change and can make a dramatic effect on the vehicles engine performance and fuel consumption if in need of replacement.
Air filters (2 off ) are housed between the headlights and are part of the air flow monitor so a degree of care is required.First remove the centre panel by removing the two 10 mm bolts and pulling the panel away. Release the spring clips on the actual filter housing and the three phillips headed bolts. now undo but not remove the two jubilee clips attaching the housing to the intake pipes, this is in order to afford a little more movement.The air box lid should now pull up and back (takes a minute or so sometimes) to reveal the two filters.If new elements are available fit these, if not turn the filters around 180 degrees to extend the life span off the filter slightly. Take care when replacing the lid to ensure it sits square and tighten all bolts and clips, refit centre panel and align with bonnet.
Zedworld replacement price Ł32:00 *
To begin a diag it is best to take a short drive 2 or 3 miles to ensure full working temperature has been obtained first.and then switch OFF the engine
With overdrive switch in on position and lever in P switch on ignition but do not start engine,the A/T lamp should lit up for about two seconds then go out.
Switch off the ignition and move selector lever to D also switch OFF the overdrive, switch the ignition ON but do not start the car.
With the ignition still ON and after more than 2 seconds move the lever to 2 follow this by switching the overdrive switch ON.Then
move the lever to 1, and set the overdrive switch to OFF.
Still with the ignition on depress the accelerator pedal fully and release it. The A/T check light will now flash the appropriate blink
code as deatiled below. After this to retrurn to normal switchOFF the ignition and move lever to P and set the overdrive back ON.
Fault codes are read as follows: A long flash indicates the start and is not to be counted
One long flash and No 1 blink long rest normal = Revolution sensor circuit fault
One long flash and No 2 blink long rest normal = Speed sensor circuit fault
One long flash and No 3 blink long rest normal = Throttle sensor circuit fault
One long flash and No 4 blink long rest normal = Shift solenoid `A` fault
One long flash and No 5 blink long rest normal = Shift Solenoid "B" fault
One long flash and No 6 blink long rest normal = Overrun clutch solenoid fault
One long flash and No 7 blink long rest normal = Lock up solenoid fault
One long flash and No 8 blink long rest normal = Gearbox fluid temerature sensor circuit fault
One long flash and No 9 blink long rest normal = Engine revolution sensor circuit fault
One long flash and No10 blink long restnormal . = Line pressure solenoid circuit fault
One long flash and 10 equall length blinks...... = All clear
NOTE
If when attempting this test no A/T check lamp operation a system check of the inhibitor switch,overdrive switch,kickdown switch or idle switch circuit will be required.
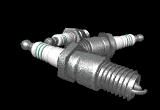
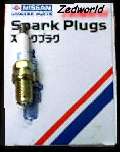
Spark Plugs...
Changing the plugs is a 60 k miles requirement according to the service advice from Nissan but half of this is closer to what we reccomend and less if high boost upgradeds are used.
The first four plugs are easily accessed by removing the 2 x 12 mm bolts retaining the coil packs and releasing the fiddly and brittle connectors.A long reach 14mm spark plug tool is required.
The two remaining rear plugs require the removal of the inlet manifold balance bar.this is held by bolts at either end and a series of small pipes.What you need to do is one plug (side) at a time and that way the rubber tubes do not all need removing.Be aware there are two o ring seals on the passenger side and a single one on the drivers side....be careful not to loose these if they become dislodged.Re fit the tube once the plugs are all changed.
Note: ( 1 ) When fitting new plugs dap a small amount of copper slip on one side of the thread to aid fitting and removal at a later date.
Note: ( 2 ) Ensure the gap is set correct, do check your manual for this but expect it to be 1.1 mm.
Zedworld replacement price Ł90:00 * ( full set of six)
Throttle bodies cleaning tips.
Throttle bodies and the butterfly throttle plate become dirty and coated during use, this can lead to poor idle, stalling or unstable revs when coming off the loud peddle or on it at pull away.
First remove both inner rubber tubes from the throttle bodies, these are held on by large jubilee clips and are undone by either a flat screw driver or 8mm socket dependant on year.
Once removed jam a large screwdriver in the centre of the throttle shaft linkage in such a manner to keep the throttle plates open.Now wrap a generous amount of paper towel under the tb`s, an old toothbrush and a can of carb or brake cleaner is required to clean out the muck in there, once cleaned out dry and replace rubber tubes.
When starting the car it will be noticed a that there is a reluctance to fire first time and when it does runs uneven or misfires for a few second., this is normal and is caused by the cleaning product burning off in the engine and upsetting the mixture.
The cleaning process will inevitably will change the air flow characteristics (whole point of cleaning) and the ecu will take a little while to relearn the new settings,during this period the car may feel odd at tickover but do not worry within a few miles it will sort it`s self out (100 miles has been suggested before we have found this to be not the case)
An alternative is to reset the ecu by disconnecting at the battery or at the ecu connector(preferred) for over 30 minutes.
Ecu fault code Testing
Ecu fault codes are a usful tool in tracing possible engine problems quickly. To access these codes the ecu needs to be put into test mode. To do this you need to access to the unit itself, it is located in the passenger footwell under a wooden board secured by 4 x 10 mm bolts. then the ecu can beidentified by been the one with the very large blue connector. release the unit by undoing the 3 x 10mm bolts.
Once removed, turn the unit until a little window with and led is visable.Next to this will be a screw, with the ignition on turn this screw fully clockwise, count to 2 then return to original position.The led on the unit and the engine check light on the dash will now flash the first longer flashes are the tens the second shorter flashes are the units, so 5 long flashes followed by 5 short flashes is code 55 which indicates all clear. If complete return to normal mode by turning the screw fully clockwiseagain, count to 2 then return to original position.The led will now be lit, turn off the ignition and refit the ecu.
However if anything other than code 55 came up refer to the list below and take the appropriate measures.For further help with individial code faults e-mail to the help line below with as much information as possible and we will try to resolve it with you.
Fault Codes
No 11 Crank angle sensor circuit or sensor fault
No 12 Air flow meter circuit or sensorfault
No 13 Engine temperature circuit or sensor fault
No 21 Ignition circuit fault
No 34 Detonation circuit or sensor fault
No 42 Fuel temperature circuit or sensor fault
No 43 Throttle body circuit or sensor fault
No 54 Communication circuit fault to auto transmission
No 54 All clear
Some tip`s and time saving hints
1)Detonation sensor
Safety boost is a feature of the 300`s ecu that is to prevent damage caused by detonation or "pinking" as often known.However if the sensor performing this fails the car will be in permanant safety boost regardless of detonation or not.
A code 34 fault code from the ecu (see help page) requires a detonation sensor/circuit check, as in all cases where a faulty sensor is the cause a tempory fix can to be to substitute a 1 meg ohm resister in the place of the sensor.This effectively fools the ecu in to operating back in full boost mode,the pics below show the location and method of insertion, although the for tempory the resister can be inserted in to the spades of the plug.
However one point to remember is if detonation occurs after this fix is in place the ecu cannot do anything about it, so if you have a det problem it will requires attention, look for air leaks low fuel rating (try another fuel garage) try Super unleaded, check timing, and poss fueling / injector faults.
2)Sudden or unexpected engine stall or fail to restart until cool is almost always the PTU (power transister unit)This sits to the left of the cambelt cover and is silver in colour with cooling fins. Cooling the unit with a moist cold rag will often confirm the diagnosis as the engine will often restart when the unit is cooled.
Once this has occured, the Ptu is scrap and MUST be replaced, currently thses retail around Ł275 from Nissan UK but can be bought for half that from Curtesy Nissan in the US and as abonus they sell an upgraded version as ptu failure was dealt with some years ago as a recall, but sadley not in the UK.
3)Pressure loss at the radiator cap can cause all sorts of strange overheating problems and as this is one of the least expensive parts
you can buy for a zed it is worth changing even if you do not have a problem.....yet!
4)Poor cold running with misfires is often down to poor connections at the injector`s which is worse when the engine is cold, disconnect
clean and spray with WD40 usually sort`s it out.
5)Excess fuel usage and black exhaust tips together with uneven running is normally a sign that either the air filters are blocked or
the 02 oxegen sensor`s are playing up, a mode two ecu check should help to show this or failing that ask an Mot station to do an
emmissions test in both exhausts to see if one or both sensors require changing.
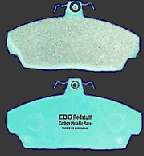
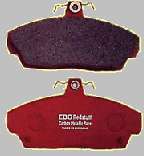
6)Brakes have a hard time on a Zed and often are a cause for concern due to fade or lack of bite.
A quick way to improve bite and effectiveness between pad changes is to remove the raod wheel and roughen up the disc face and
pad`s with emery paper to break the glazing.
The rear steering or Hicas system is simply in its idea but quite complex in how it actually works, other than keeping the system topped up with fluid there is little DIY work that can be done, there are extensive testing proceedure`s but really a Conzult or dealer testing system is required.
The braking system on the 300zx is as with many performance cars is on the limit, this is why ot is important to keep the system well serviced and new parts to be fitted when any problem occurs.
Changing the front pads is straight forward
Remember to use tools and vehicle supports designed for the job...safety is paramount if in doubt let a garage do the work for you.
1) Remove road wheels and secure, refit wheel nuts to hub and hand tighten up to disc.
2) Remove spring clip at rear of caliper retaining the pad pins
3) Remove the pad pins by puilling outwards, be aware to hold the pad squeel clip in place as it will spring out when the pins are withdrawn.
4) Slightly push back the pad so as they can be pulled out.
5) Clean up the area and ensure the pistons are fully pushed back (slowly)
6) Apply a small amount of coper slip to rear of pad and insert into caliper along with the backing shims from the old pads.
7) Replace the locating pins and secure with the rear spring wire retainer.
8) Secure the wheel and tighten to the correct torque (90-95 lbs)
Zedworld replacement price Ł45:00 *
Note the disc size is different on the non turbo...ensure the correct parts are fitted.
The braking system on the 300zx is as with many performance cars is on the limit, this is why ot is important to keep the system well serviced and new parts to be fitted when any problem occurs.
Changing the front pads is straight forward
Remember to use tools and vehicle supports designed for the job...safety is paramount if in doubt let a garage do the work for you.
1) Remove road wheels and secure, refit wheel nuts to hub and hand tighten up to disc.
2) Remove spring clip at rear of caliper retaining the pad pins
3) Remove the pad pins by puilling outwards, be aware to hold the pad squeel clip in place as it will spring out when the pins are withdrawn.
4) Slightly push back the pad so as they can be pulled out.
5) Clean up the area and ensure the pistons are fully pushed back (slowly)
6) Apply a small amount of coper slip to rear of pad and insert into caliper along withthe backing shims from the old pads.
7) Replace the locating pins and secure with the rear spring wire retainer.
8) Secure the wheel and tighten to the correct torque (90-95 lbs)
Zedworld replacement price Ł45:00 *
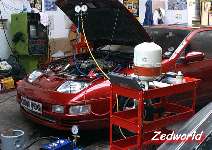
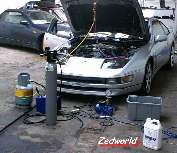
Regassing and R12 conversions
Due to the requirement of specialist equipment this is NOT a diy job.
Zedworld replacement price Ł80:00*

......................................
.......................

.................................
................................................
..*All prices + Vat unless otherwise stated

........................

...........................
.
Web design & host by Security Technology ...........................No reproduction or copies to be made without permission ................................C 2007 United Kingdom.
 .........

 ...........
 .
.
 ..
.. ..
.. ..
..